Instructions for installing and using the necessary software for the exercises and the exam of the Data Engineering for Data Science course.
All you need is:
Contents
Installation
The following section describes the installation and usage of the software required to complete the practical exercises (and exam) of the Data Engineering for Data Science course.
The required software (Jupyter Notebook, Hadoop, Spark, ...) is deployed as a docker compose script, so on the one hand there is no need to install and configure the required software stacks, and on the other hand everyone is working with the same software versions, which eliminates version-related problems.
Therefore, the only requirement is to install Docker and Docker Compose on Linux and Docker Desktop on Windows and Mac (as well as WSL on Windows).
Installation of Docker and Docker Compose
This section provides instructions for installing docker and docker compose on Linux, Windows and Mac.
NOTE: The installation guide primarily uses terminal commands! For those who have never worked with a Linux terminal before and/or are new to working with WSL, we have collected some hints: DEDS_Linux_Mini_Cheat_Sheet.pdf
Versions:
- Docker-Engine: It is recommended to use at least version 20.10.17.
- Docker-Compose: Make sure you use at least version 1.29.2, because older versions are not compatible with the docker-compose.yml file used here.
Linux
See the following links for installation instructions under Linux (Ubuntu):
- Docker-Engine: https://docs.docker.com/engine/install/ubuntu/
- Docker-Compose: https://docs.docker.com/compose/install/linux/
NOTE: It is necessary to be able to limit the memory and CPU usage of Docker containers!
Use the following command to verify that the operating system is set up to use resource limits:
sudo docker info
If you receive the output WARNING: No swap limit support, limiting resources has not been enabled by default!
Here you will find instructions on how to configure the use of resource limitations.
Windows
For using docker and docker compose on Windows the installation of a Linux distribution is required (WSL 2 backend)!
NOTE: It is strongly recommended to use WSL 2. Otherwise, Docker for Windows creates a Hyper-V VM in the background. On the one hand, this leads to a significant performance overhead and, on the other hand, the default values of the main memory available for the VM have to be adjusted (at least 6 GB, better 8 GB)!
Follow this instructions to install WSL 2 (and also install Ubuntu >= 18.04)
Docker-Desktop can then be installed and configured to use WSL 2
Mac
Follow this instructions to install Docker-Desktop under Mac.
Since macOS uses a hypervisor in the background, default parameters such as available main memory may need to be adjusted! Docker containers should have at least 6 GB RAM (better 8 GB) available.
NOTE: We provide docker images for amd64 and also for arm64 ("Apple Chip")
Clone the Git Repository
If not already available, you can install git as follows (Ubuntu):
sudo apt install git
To clone the repository, open a terminal, change to a directory of your choice and execute the following command:
git clone https://code.dbis-pro1.fernuni-hagen.de/\
pub-access/data-engineering-infrastructure.git \
data-engineering-infrastructure.git
Change to the cloned directory:
cd data-engineering-infrastructure.git
Checkout the current release:
git checkout $(git tag | sort -V | tail -1)
Alternatively Download a Release
Go to GitLab and download the newest release.
You can also download the release on the command line:
wget https://code.dbis-pro1.fernuni-hagen.de/pub-access/data-engineering-\
infrastructure/-/archive/v0.5.0/data-engineering-infrastructure-v0.5.0.tar.bz2
Extract the downloaded archive:
tar xvjpf data-engineering-infrastructure-v0.5.0.tar.bz2
Update
This section describes how to upgrade to the latest release when a new release appears after installation (you will be informed when there are new releases).
First stop and delete the containers of the currently used version
docker-compose down
Then download the new tags from the remote server
git fetch --tags
Finally you can switch to the latest release (tag)
git checkout $(git tag | sort -V | tail -1)
NOTE: If a release was manually downloaded and unpacked, the latest release must be downloaded accordingly. Then the
workspace/folder of the new version can be replaced with the folder from the old version.
Usage
The following figure shows the infrastructure of the software used:

To launch the docker containers (via docker compose), first change to the folder of the cloned git repository. Note, the folder name may be different if you have downloaded a release:
cd data-engineering-infrastructure.git
NOTE: Don't start the Deployment as root.
The docker containers can then be started with the following command:
./Deploy-DeDs-Rocket.sh
NOTE: To run in background use:
nohup ./Deploy-DeDs-Rocket.sh
To run a Deployment with reduced ressource needs use:
./Deploy-DeDs-Firework.sh
If only the Pyspark client node is necessary you can start it with the command:
./Deploy-DeDs-Candle.sh
If the containers were started in the foreground, they can be stopped by strg-c. Otherwise the containers can be stopped with the following command:
docker compose stop
Workspace
The working directory of the Client Node (PySpark and Jupyter Notebook) is: data-engineering-infrastructure.git/workspace/ (path can be different if you have downloaded a release)
NOTE: Place all your files (jupyter notebooks, etc.) under the workspace/ folder!
Docker Volumes and the Different File System Paths
The workspace/ folder inside the data-engineering-infrastructure.git repository is a so-called Docker volume. First of all, you need to be aware that Docker containers contain their own file system as well as the Linux distribution's directory structure (similar to a virtual machine). A volume is a folder that is shared between the host and one or more docker container. This means that the contents of the folder on the host are also available inside the container and vice versa.
Since the notebooks are executed within the client-node container, all file system paths used in the code cells must be related to the file system within the container. For example, if a file named data.csv is located in the workspace folder on the host, the path to use the file in a notebook is "/home/pyspark-client/workspace/data.csv ". The following graphic illustrates the shared folder between the host and Docker container.

Shared folder (Docker volumes) between the host and multiple Docker containers.
Docker in Docker (dind)
Since we want to start and stop other containers on the host via the notebooks, which are, after all, running inside a Docker container, Docker was also installed in the client-node Docker container so that we can use the host's Docker daemon via a Docker volume. The following graphic illustrates this.

Docker in Docker via a Docker volume.
Web UI URLs
Below is a list of URLs for accessing the Jupyter Notebook and Hadoop (via a web browser of your choice):
- Client-Node:
- Jupyter Notebook: 127.0.0.1:8888
- Spark web UI (only available during running spark jobs!): 127.0.0.1:4050
- Hadoop Edge-Node
- ResourceManager: 127.0.0.1:8088
- NameNode: 127.0.0.1:9870
- Hadoop Worker-Node 1
- NodeManager: 127.0.0.1:8041
- DataNode: 127.0.0.1:9901
- Hadoop Worker-Node 2
- NodeManager: 127.0.0.1:8042
- DataNode: 127.0.0.1:9902
Ports
The following is an overview of the ports used (mapping from docker container to host):
| Host OS | Container | Description |
|---|---|---|
| 8888 | 8888 | Jupyter Notebook web application |
| 4050 | 4050 | Spark web UI (only available during running spark jobs!) |
| 9000 | 9000 | NameNode metadata service (Edge-Node) |
| 9870 | 9870 | NameNode web UI (Edge-Node) |
| 8088 | 8088 | ResourceManager web UI (Edge-Node) |
| 8041 | 8042 | NodeManager web UI (Worker-Node 1) |
| 9901 | 9864 | DataNode web UI (Worker-Node 1) |
| 8042 | 8042 | NodeManager web UI (Worker-Node 2) |
| 9902 | 9864 | DataNode web UI (Worker-Node 2) |
Installation of Further Libraries
All libraries required for completing the tasks are already available in the Docker image provided. However, if additional or individual libraries are required, they can be installed within the container as follows.
Installing using the Termin from the Jupyter WEB UI (127.0.0.1:8888)
Open the Terminal:
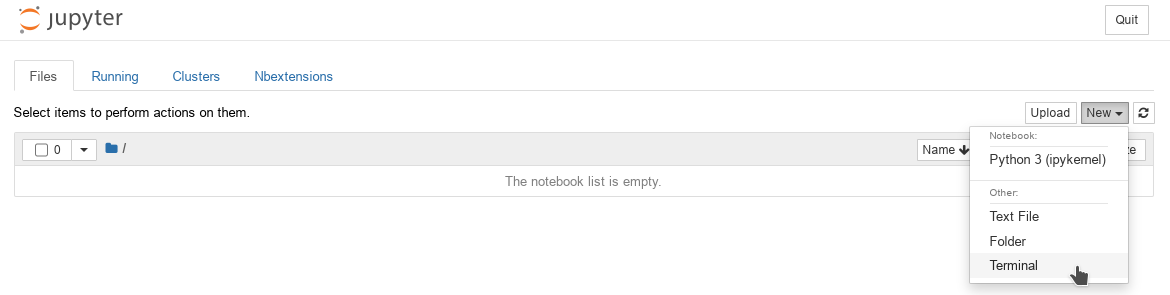
Start page of the Jupyter Notebook WEB UI (open new terminal)

Jupyter Notebook WEB UI Terminal
To install additional Python modules as a user with pip:
python -m pip install <MUDULE> --user
Additional software can also be installed system-wide via Ubuntu's Advanced Packaging Tool (APT):
sudo apt install <SOFTWARE>
NOTE: The user password is the same as the username :)
Installing using the Docker Container Terminal
There are several possibilities here. On the one hand, the command can be "passed" to the container:
Python modules
docker exec -t dbis-pyspark-client-node \
bash -c "python -m pip install <MUDULE> --user"
System-wide Software via APT:
docker exec -t dbis-pyspark-client-node \
bash -c  "echo 'PASSWORD' | sudo -S apt install <SOFTWARE>"
Alternatively, you can open a terminal inside the container and execute the commands:
docker exec -it dbis-pyspark-client-node bash
Installing using a Notebook Code Cell
The software can also be installed via a Jupyter Notebook cell (bash cell magic):

Jupyter Notebook bash cell, pip command

Jupyter Notebook bash cell, apt install command
Jupyter Notebook
This section provides a brief introduction to using Jupyter notebooks via the Web UI or remotely (accessing the notbook server running local inside a docker container) in VSCodium.
Using the Web UI
The Jupyter Notebook Web UI can be accessed with any web browser (Chromium, Firefox, ...) at the following URL:127.0.0.1:8888
NOTE: Here all files are listed, which are located in the folder workspace (empty at the first start).
Start page of the Jupyter Notebook WebUI
Export a Jupyter Notebook (PDF)
A Jupyter Notebook can be exported as a PDF file under File -> Download as -> PDF via LaTeX (.pdf):
![]()
PDF export with the nbconvert extension
Using VSCodium
First install the Jupyter Extension from ms-toolsai:

VSCodium Jupyter (ms-toolsai) Extension
Then open the corresponding notebook file (.ipynb) with VSCodium. To connect to the remote notebook server open the Command Palette (by pressing STRG+Shift+P), start typing Jupyter and select Jupyter: Specify Jupyter Server for Connections:
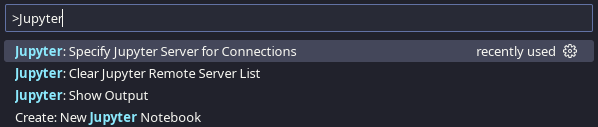
VSCodium command palette, Specify Jupyter Server for Connections
Afterwards choose Existing:
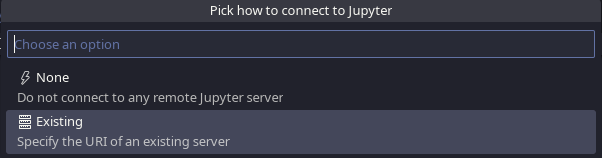
VSCodium Specify Jupyter Server for Connections, pick how to connect to Jupyter
Enter the following URI and press enter: http://127.0.0.1:8888/?token=None:

VSCodium Specify Jupyter Server for Connections, enter the URI of the running Jupyter server
Now you can run the notebook cells remotely with our Docker environment :)
Once you have set the remote URI, the next time you open a notebook file you can simply select the server by clicking Jupyter Server: Remote in the lower right corner of the VSCodium window:

VSCodium Jupyter Server: Remote icon
And choose the last used connection:

VSCodium Specify Jupyter Server for Connections, pick last used connection
Export a Jupyter Notebook (PDF)
To export the notebook as a PDF file you can use the following code cell (does not work with the WEB UI!):
import os, IPython, subprocess
nbpath = os.path.join(
    "/home/pyspark-client/workspace",
    IPython.extract_module_locals()[1]["__vsc_ipynb_file__"]
    .split("/workspace/")[1])
cmd = "jupyter nbconvert --to pdf --Exporter.preprocessors nbconvert.preprocessors.ExtractAttachmentsPreprocessor --template /home/pyspark-client/nbconvert-templates/fernuni-latex "+nbpath
p = subprocess.Popen(cmd.split(), stdout=subprocess.PIPE)
output, error = p.communicate()
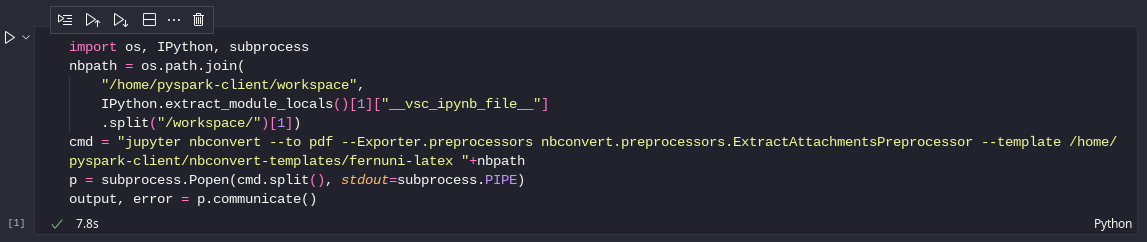
VSCodium notebook code cell to export as PDF
Alternatively you can use the following bash cell which also works with the WEB UI (you have to manually set the path to the notebook file):
!jupyter nbconvert --to pdf --template \
'/home/pyspark-client/nbconvert-templates/fernuni-latex' \
--Exporter.preprocessors nbconvert.preprocessors.ExtractAttachmentsPreprocessor \
~/workspace/PATH/TO/FILE.ipynb
NOTE: You can ignore the WARNING and CRITICAL messages from inkscape regarding dbus. Dbus is mostly a messaging system for things like notifications. The errors probably only mean it can't find dbus running, which shouldn't hurt anything.